|
|
|
# Overview
|
|
|
|
|
|
|
|
The Leica STELLARIS 8 gives you:
|
|
|
|
|
|
|
|
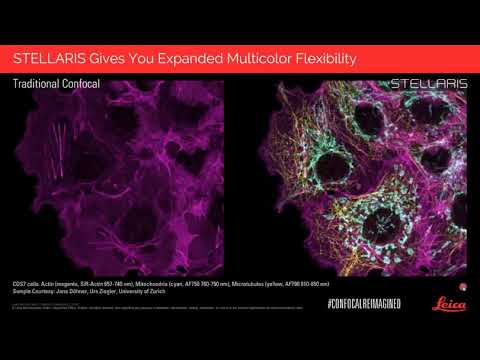
- **Power to See More:** The synergy between the new generation of Power HyD detectors, the completely optimized beam path with our proprietary Acousto-Optical Beam Splitter (AOBS), and the unique White Light Laser gives you optimized multicolour imaging performance – true spectral freedom and spectral detection
|
|
|
|
- **Potential to Discover More:** Gain access to functional imaging thanks to TauSense, a revolutionary set of imaging modes based on fluorescence lifetime – fast becoming a new standard for the quality of images and quantity of information generated.
|
|
|
|
- **Productivity to Do More:** ImageCompass is a completely new smart user interface which guides you through your experiment set up and acquisition in an easy and intuitive manner. Setting up complex experiments is now significantly easier and more intuitive than ever before.
|
|
|
|
|
|
|
|
This webinar gives a detailed overview of this system:
|
|
|
|
|
|
|
|
[](http://www.youtube.com/watch?v=gAPWXJL6Duw "STELLARIS Confocal Re Imagined")
|
|
|
|
|
|
|
|
# White Light Laser
|
|
|
|
|
|
|
|
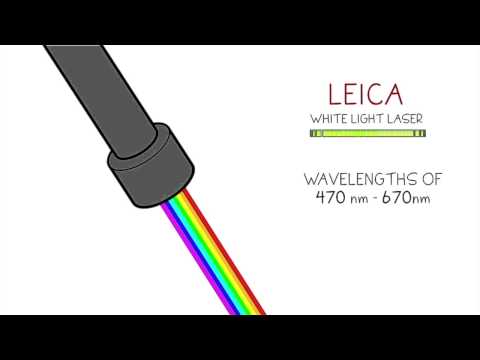
The Stellaris 8 confocal microscope utilises a Leica White light laser.
|
|
|
|
|
|
|
|
Details about the WLL can be found in this video:
|
|
|
|
|
|
|
|
[](http://www.youtube.com/watch?v=h8QcpSiORKM "White Light Laser")
|
|
|
|
|
|
|
|
# Turning on the microscope
|
|
|
|
1. Check which stage adapter is in place. If you need to change the stage adapter, do it before you start the microscope.
|
|
|
|
|
|
|
|
2. Switch on the microscope.
|
|
|
|
|
|
|
|
a. The Main System should always be ON.ie. DO NOT TURN OFF!
|
|
|
|
|
|
|
|
b. Turn on Lasers.
|
|
|
|
|
|
|
|
c. Turn key for lasers 90 degrees clockwise. Laser emission light will come on.
|
|
|
|
|
|
|
|
<img src="uploads/20b5f19a69de727da3cc3b5b45af1b9b/image.png" width ="300">
|
|
|
|
|
|
|
|
<img src="uploads/3233d3808a8f34aa75499b91d92e1e5c/image.png" width="300">
|
|
|
|
|
|
|
|
d. Turn on FL light source.
|
|
|
|
<img src="uploads/0e474517f88a2c39638db9180536b7fb/image.png" width="400">
|
|
|
|
|
|
|
|
e. Turn on computer and open LAS X software. Ensure you select the "machine without z galvo" configuration during start up.
|
|
|
|
|
|
|
|
|
|
|
|
You are now ready to use the microscope.
|
|
|
|
|
|
|
|
NB. Follow this sequence in reverse to turn off microscope.
|
|
|
|
|
|
|
|
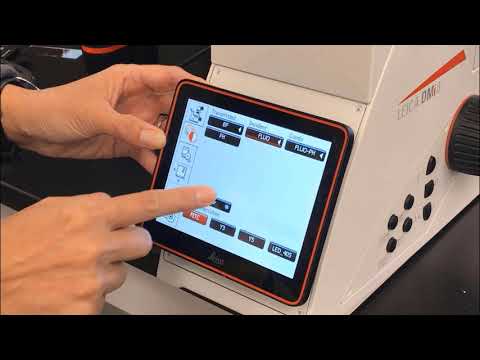
# Using the microscope touchscreen
|
|
|
|
|
|
|
|
This video details how to use the DMi8 touchscreen to control the microscope
|
|
|
|
|
|
|
|
[](http://www.youtube.com/watch?v=_qW53Y3RbVo "DMi8 Touchscreen overview")
|
|
|
|
|
|
|
|
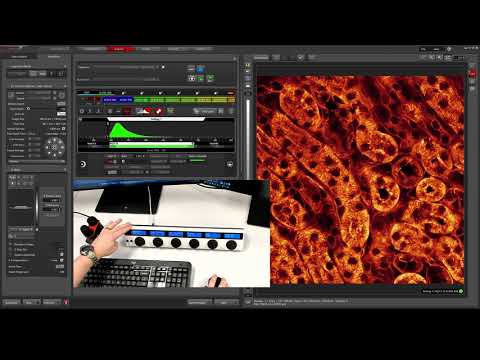
# LAS X Software
|
|
|
|
|
|
|
|
The Stellaris microscope is controlled through the LAS X software.
|
|
|
|
|
|
|
|
A short overview to this software is given here:
|
|
|
|
|
|
|
|
[](http://www.youtube.com/watch?v=VGtTtBkoih4 "LAS X software overview")
|
|
|
|
|
|
|
|
# Navigator
|
|
|
|
## Autofocus techniques
|
|
|
|
### Hardware Autofocus
|
|
|
|
[](http://www.youtube.com/watch?v=3uq42XefHhY "Navigator Hardware Autofocus")
|
|
|
|
|
|
|
|
### Autofocus
|
|
|
|
[](http://www.youtube.com/watch?v=9JMbDgOmvQg "Navigator Autofocus")
|
|
|
|
|
|
|
|
## Right Click tips
|
|
|
|
|
|
|
|
[](http://www.youtube.com/watch?v=2EZfVGzeZz4 "Navigator Right click tips")
|
|
|
|
|
|
|
|
# Image Visualisation and Analysis
|
|
|
|
## Introduction to LAS X Image Analysis
|
|
|
|
|
|
|
|
[](http://www.youtube.com/watch?v=_89zsc6zWno "LAS X Image Analysis")
|
|
|
|
|
|
|
|
## Movie Editor
|
|
|
|
[](http://www.youtube.com/watch?v=AwvCCQ8M0Aw "LAS X Movie Editor")
|
|
|
|
|
|
|
|
## 3D Viewer
|
|
|
|
[](http://www.youtube.com/watch?v=SmwteUShSwk "LAS X 3D Viewer")
|
|
|
|
|
|
|
|
## Scale Bars
|
|
|
|
[](http://www.youtube.com/watch?v=zvwveZjGjp8 "LAS X Creating and Exporting Scale Bars") |
|
|
|
\ No newline at end of file |